
InDesign Templates
With the ePrintcost plugin for InDesign, you can create your templates within inDesign, then export them for importing into ePrintcost. When importing, you can specify the alignment and relative positioning of each object.
On this page:
Table of Contents:
- About the ePrintcost Export Plugin for Indesign
- Installing the Plugin into InDesign
- Importing an InDesign Template into ePrintcost
About the ePrintcost Export Plugin for Indesign
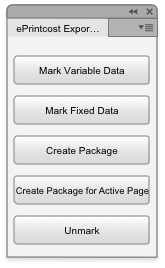 ePrintcost Export Plugin for Indesign
The plugin has a number of features that you can use to mark up the text boxes in your template.
Mark Variable Data
Select the relevant text field, then click 'Mark Variable Data' to ensure the field remains editable by the customer when creating or editing a child document in ePrintcost.
Note: In the example below, the variable data fields are:
- Firstname Lastname
- Job Title
- 555 123 456
- 555 123 457
- email@1semper1.com
- 123 Address, Suburb, City,
Mark Fixed Data
Select the relevant text field, then click 'Mark Fixed Data' to ensure the field cannot be edited by the customer when creating or editing a child document in ePrintcost.
Note: In the example below, the fixed fields are:
- Phone
- Fax
Note: You can also specify an image as variable or fixed data. Doing so ensures it is available as an image object in ePrintcost.
Create Package
When your template is ready to export, click 'Create Package' to export the entire document to a package that can be imported into ePrintcost.
Create Package for Active Page
If your document has multiple pages and you only want to export the page that is currently displayed in InDesign, click 'Create Package for Active Page'.
Unmark
If you don't want a marked text field to be a data field, you can unmark it. To do this, select the relevant text field, then click Unmark.
Note: In the example below, the following text fields are unmarked and will be collapsed down to the background image layer when the package is exported:
- SEMPER
- Lorem Ipsum Dolor Sit Amet Consectetur Adipiscing Elit
- www.1semper1.com
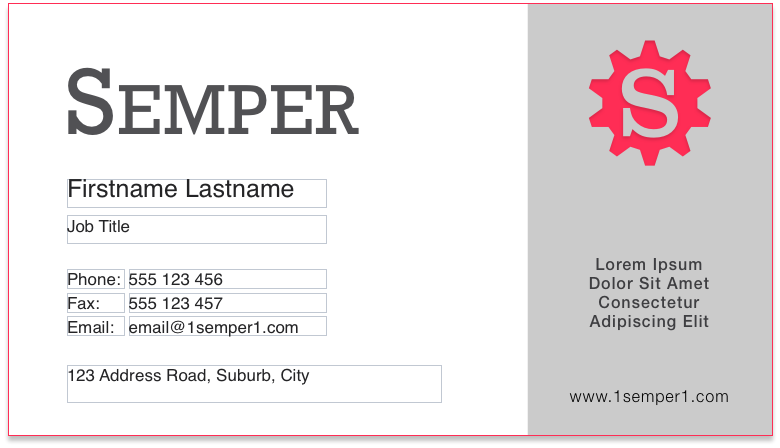 Template Document Created in Indesign
Installing the Plug-in into InDesign
Before you begin
Before installing the ePrintcost plug-in for InDesign, ensure that you have received the plugin from Printcost.
To install the plug-in into inDesign:
For help with installing plug-ins, please refer to the help documentation that came with InDesign.
Note: Installing plug-ins may vary from one version of InDesign to another. Generally it involves:
- unzipping (decompressing) the downloaded zip file
- locating the InDesign plug-ins folder on your computer, and
- moving the plug-in file to the InDesign Plug-Ins folder.
- Note: So that third-party plugins don't get mixed up with Adobe's plug-ins, you may want to create a folder within the Plug-Ins folder and call it, e.g., 'Third-Party Plugins', then drop the file into this new folder.
What Next?
Start InDesign, click the Window menu, then click 'ePrintcost Export xml'
Note: The ePrintcost Export xml window is displayed.
Importing an InDesign Template into ePrintcost
Before you begin
Before importing an InDesign generated template into ePrintcost, ensure that:
- the zip file to be imported has been exported from InDesign and is accessible from the computer that you are using.
- Note: There is no need to unzip the zip file.
- you are logged into ePrintcost as an administrator, and
- the ePrintcost Manage Document Templates page is displayed.
- To do this sign into ePrintcost, and from the footer of the Welcome page, click DesignOnline, then click Manage Templates.
To import the InDesign Template into ePrintcost:
- On the Manage Templates page, click 'Import document template from Indesign'.
- Result: You will be requested to choose a file.
- Click Choose File, locate and select the relevant zip file.
- Click Next.
- Result: A range of editable template settings is displayed.
- (Optional) Modify the template name, dimensions and customer code.
- Specify a quantity.
- Note: Ensure the quantity entered here matches what is specified in the quote.
- Enter a quote number.
- Click Next.
- Result: You will be requested to check and define the text objects in the template.
- (Optional) Make any corrections that you require.
- Note: For each text object and field, you can change the name, the content of the text object that will be displayed to the users, and the fonts used for each text object.The fonts that are available are the ones that were imported from the zip file. You can import other fonts after importing the template.
- It is recommended that you assign names that you can easily recognise. It's also useful to differentiate a user editable field from the field's label as in the example below
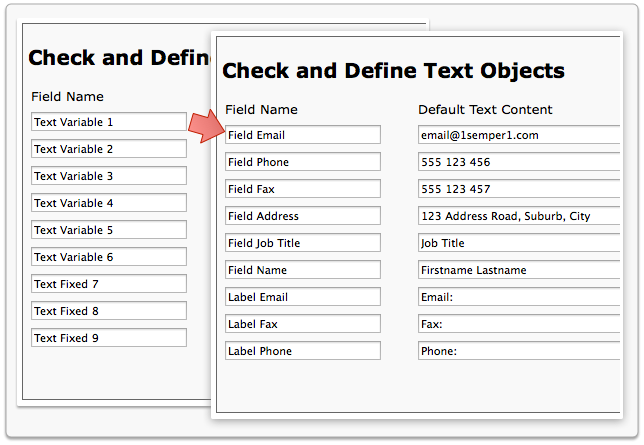 Check and Define
 - Click Next.
- Result: You will be requested to define the text object positioning relationships.
- Define the text object positioning relationships.
- Note: Ensure that the alignment of each object is correct and that each object is linked correctly and positioned correctly. Whatever you select here may not affect the layout of the card in the template, but may affect the layout of the child document when changes are made by the customer.
- Click Finish.
- Result: The Edit Template page displays the imported template.
 Template Settings
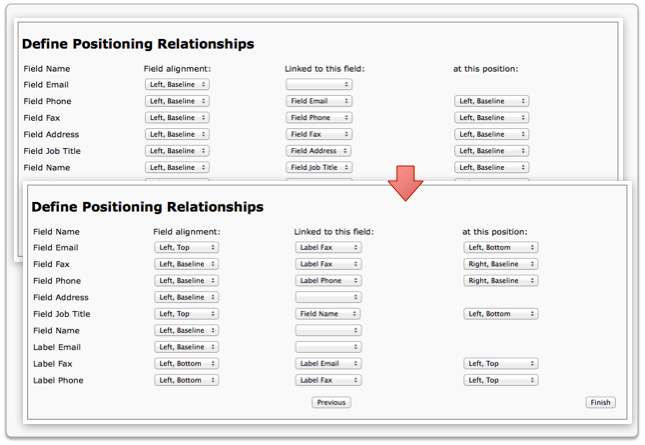 Define Positioning Relationships
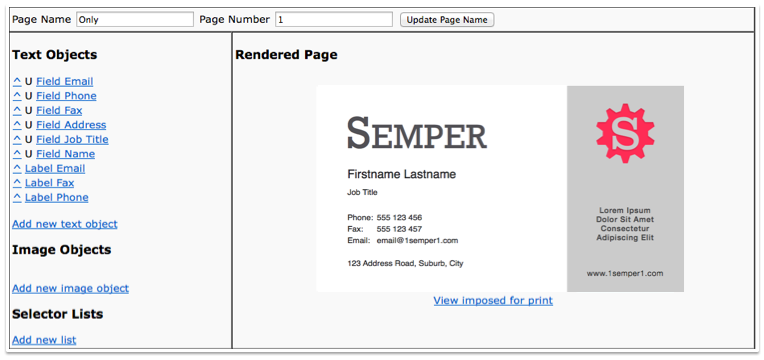 Imported Template
What Next?
If relevant, make adjustments to the layout or text objects as required. For information on how to do this and other tasks, see the topics under Basic Templates and Advanced Templates.