
Overview
On this page:
Table of Contents:
Receipting Purchase Orders
With Printcost, you can receipt:
- stock that you have taken delivery of from a supplier
- transferred stock from one of your warehouses to another
- stock the supplier owns that is now on your premises (Into Consignment)
- stock you own that is now held by your supplier (Into Indent)
Note: With regard to receipting into indent (as opposed to from indent), there is no physical receipt. However, it is important that the information is entered so that Printcost can show the stock on hand that is held by the supplier (that can be called off) .
Before you begin
Before receipting any purchase orders, ensure that:
- you have the relevant paperwork. This may be one of the following:
- A delivery docket for the stock that have been received.
- For a consignment, the consignment note from the supplier for stock taken.
- For indented stock, the indent note from your supplier.
- the Receipts Stock window is displayed.
Note: To do this, on the left-menu, click Inventory / Orders, then click Receipts.
To receipt purchase orders:
- In the Receipts window, click New Receipt.
- Result: The New Receipt Docket window is displayed.
- In the Docket Ref field, type the number from the delivery docket indent note or consignment note.
- Note: This is the number printed on the delivery docket.
- Click either 'From Supplier' or 'Transfers'
- Note: If you are receipting stock from a supplier, click From Supplier. If you are receipting goods received from one of your other warehouses, click Transfers.
- Note: Clicking All sources will list both suppliers and transfers.
- In the top-right of the window, click the relevant 'Receipt To' option.
- Note: Click General if you are receipting goods from any source into production or a warehouse, for example, for receipting stock that you have taken delivery of, stock from consignment, from indent, or from another of your warehouses.
- Note: Click 'Into Consignment' if you are receipting stock into consignment, that is, stock owned by the supplier that is held on your premises.
- Note: Click 'Into Indent' if you are recording stock that your company owns that the supplier acknowledges that they now have on hand.
- From the list, click the relevant supplier or transfer.
- Result: A list of expected receipts from the supplier or transfers is displayed in the Receipt Line window.
- Click the relevant receipt.
- Result: The Receipt Line or Issues Goods window is displayed.
- Note: The receipt quantity (Suppliers) or quantity to issue (Transfers) displayed, matches what was expected.
- If quantity received was less, overtype the 'receipt quantity' or 'quantity to issue' with the actual quantity and press Tab.
- Result: The receipt line is updated, and the quantity still to come is displayed under the receipt quantity. A back order is also created automatically for the items that are still to come.
- Note: If the quantity received is less than expected because it is end-of-line stock, you can change the still-to-come amount to zero. This will cancel the backorder.
- If there is more than one recipient or party, in the Allocate column, ensure that the correct quantity is allocated to each recipient/party.
- Click Confirm.
- The receipt is displayed in the Receipt Stock window.
What Next?
If the delivery docket, indent note or consignment note shows more than one item, add the other items to the receipt. Do not create new receipts for additional items on a docket/note. To add other items to the same receipt, on the Receipt Stock window, click Add Item.
If you have made a mistake, you can remove the receipt line. To do this, select the receipt line and click Un-receipt Line.
Note: If you previously split a single delivery into two with items still to come, removing the receipt line will clear the details but retain this split.
Receipting Non-Ordered Goods & Services
Sometimes, stock that wasn't ordered through Printcost may arrive. This stock should be entered into Printcost.
Before You Begin
Before receipting non-ordered goods and services, ensure the Receipts window is displayed.
To do this, on the left-menu, under inventory orders, click Receipts.
To receipt non-ordered goods and services:
- On the Receipts window, click New Receipt
- Result: The New Receipt Docket window is displayed.
- In the Docket Ref field, type the number from the delivery docket, indent note or consignment note.
- Note: This is the number printed on the delivery docket.
- Note: You can also add more information about the stock by completing the Description field.
- Click Non-Ordered
- Result: The Select Fulfilment window is displayed.
- Click Supplier.
- Result: The New Purchase Order window is displayed
- Click the relevant supplier.
- Result: The Select Item window is displayed
- Select the relevant item.
- Result: The Select Quantity window is displayed.
- In the Quantity field, type the quantity of units received from the supplier.
- Note: For general ledger purposes, you can enter the expense account and department.
- Click Confirm Order.
- Result: The Select Fulfilment window is displayed.
- On the Select Fulfilment window, select where you intend to place the remaining units.
- Result: The Select Quantity window displays the remaining units to assign.
- Click Confirm Order.
- Result: New Receipt Docket Window is displayed.
- On the right panel, click Add.
- Select where you intend to place the remaining units.
- If you want to assign the remaining of quantity units, click Confirm Order, then go to Step 11 below.
Otherwise, overtype the quantity to assign with a smaller quantity, then click Confirm Order and go to Step 1 in this panel. - Click Completed.
- Result: A new receipt for non-ordered goods that were received showing where the units were placed (fulfilled to) is listed on the Receipts window.
 New Receipt Docket Window
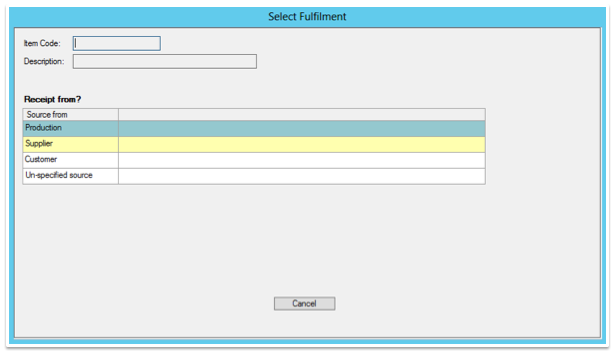 Select Fulfilment Window
 New Purchase Order Window
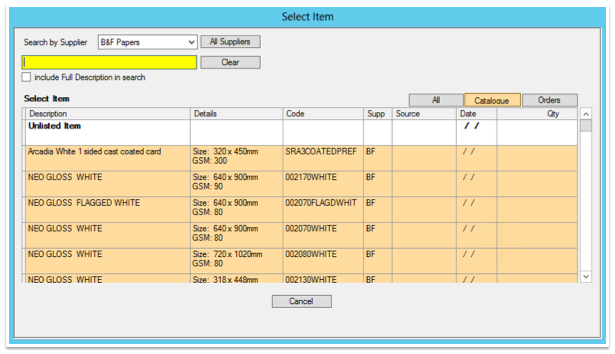 Select Item Window
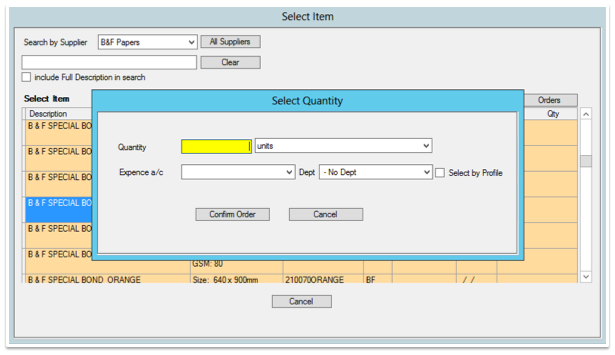 Select Quantity Window
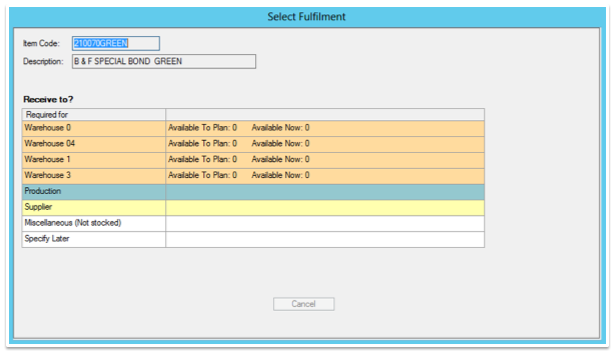 Select Fulfilment Window
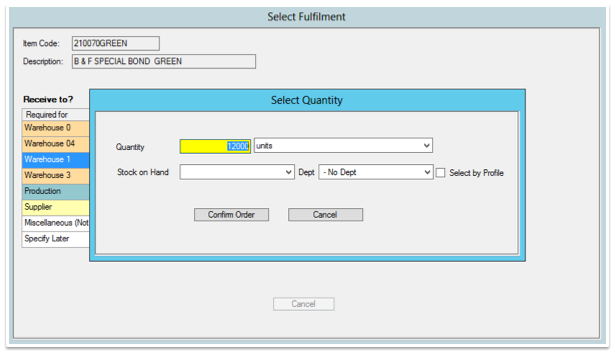 Select Quantity Window
What to do if the New Receipt Docket Window is not Displayed?
If you entered a lesser quantity in Step 9, the Fulfilment Summary window is displayed. On the left is displayed the quantity of items received. On the right is displayed the quantity of items assigned to, e.g., jobs and or warehouses. You will need to split what you received across more than one warehouse and/or job.
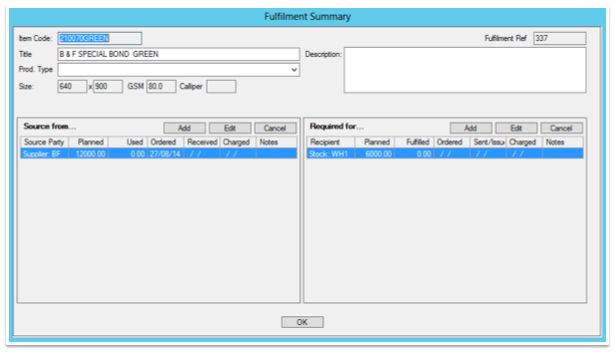 Fulfilment Summary Window
Follow these steps to split what you have received across one or more warehouses / jobs.
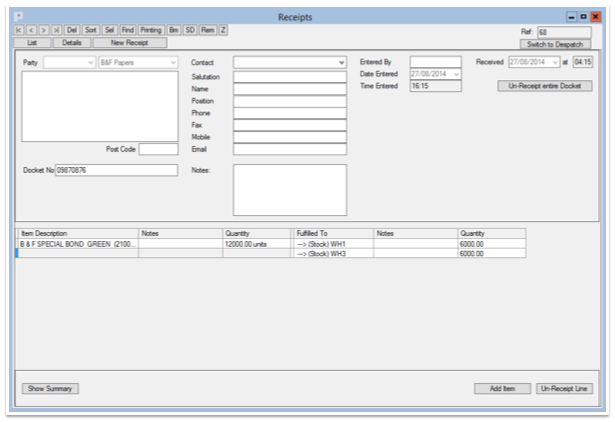 Receipts Window